This new technique which I learned from my friend Elizabeth Poole and modified a bit. I tried two methods, the modified one first. For the first, I cut strips of the backing fabric about 1.5 inches wide and put wonder under on them. I scored the wonder under down the middle and pulled off the paper. So what was left was the strip with wonder under exposed on half of it, the long way. Next step was to trim the quilt to its edges. I had already quilted most of the piece but left the outside 2 inches or so unquilted. Next, I slipped the exposed wonder under strip edge under the quilt top and over the batt, lining it up so that the papered half stuck out. Then fused it. The took the remaining paper off, turned the strip to the back side, and fused it. The result was that the batt was encased in the strip and since I used the backing fabric, it was nearly invisible. After I finished quilting the outer edges, the strip disappeared on the backside and no batt was visible.
The big problem with this technique is that it really distorted the quilt edges and they were very wavy. I really hate wavy edges, they drive me nuts. So I laid the quilt out on my work table, dampened it, and then steam pressed it flat. This seems to have worked.
 This is the back (lime green) folded across the front. You have to look closely to see the folded back edge.
 This is the edge on the front side. You can see the green strip here, but most places it's not visible. This could be a problem if the strip was some wildly different fabric from the front.
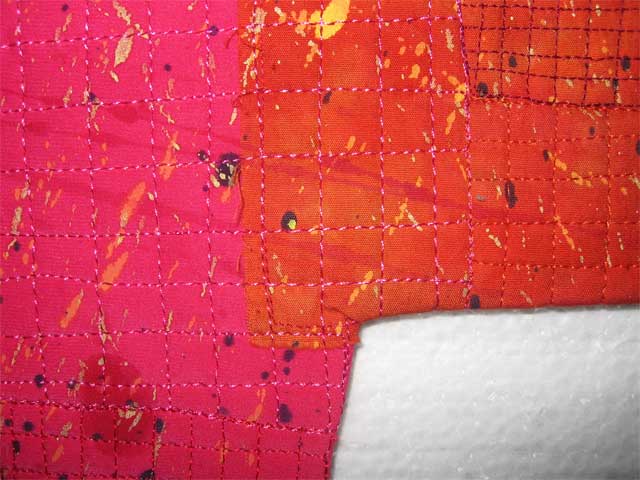
For the second piece, I didn't used the wonder undered strip. Quilted to the edge this time only leaving about 1/4" undone. This time I trimmed away the batt so that it was just slightly smaller than the top. Then trimmed the backing fabric to about 3/4" wider than the quilt. Applied wonder under to the backside of this strip, turned it to the back and fused it. Now I went around the entire outside of the quilt and adding enough stitching to ensure the back strip stayed down and also to close the gap between the top and the back so the batt couldn't show. Here's the edge from the front side.
 And from the back. You can see the folded back strip better here, partly because the edge stitching was done after the top had been quilted and so it doesn't cover the entire strip.
This second method did not distort the top at all. Both methods leave the edge rather fragile since they don't have the support of a facing, so time will tell how well I like how it holds up. I like the look.

This is the backside of the faced quilt. It's a very neat finish, but very time consuming.
This is what I mean about the fabric edges becoming offset. I don't like this, which is the major drawback to this method for my style of quilt. If I didn't have the irregular edges it wouldn't be an issue.
This coming weekend my husband and I are driving to Chicago to take some furniture that my Mother no longer needs and it doesn't fit into her studio. We are renting a minivan since neither of our cars is big enough to hold a dresser plus the other stuff. I don't much enjoy the drive and I sure hope the weather is good and the ice storm this past weekend doesn't repeat itself. We thought about flying out and renting the car to drive home but it costs more to rent a car one way for two days than it does to round trip it for four days. I guess they like their cars to always come back home.


