Saturday, October 29, 2011

Getting back to work

Now that the remodeling is finished, I have no more excuses for not being in the studio working. But I sure am out of the habit, in addition to feeling very un-creative.  So I thought I would prime the pump by doing some fabric painting. Several weeks ago I bought a Gelli plate from Gelli Arts. This is a substitute for a gelatin plate except it doesn't deteriorate nor does it need refrigeration. I thought it has a lot of positives, first off being that you don't have to plan ahead to mix up the gelatin. So I got mine out and began to play with it. The first thing I noticed is that it is much firmer than gelatin. When I tried putting leaves and other stuff on it to make an impression, they tended to slide around a bit. Also, I often put too much paint on and so ended up with a very blotchy print. I haven't quite decided if I'm in love with this or not - I think it needs more practice.

Next I watched Kerr Grabowski's Adventures in Surface Design I've taken classes from Kerr and also have her Deconstructed Screen Printing DVD, and both are fabulous. This new DVD focuses on paint, instead of thickened dye as in DSP. She does some screen printing with torn paper stencils and also works with water soluble crayons and oil pastels. These would be some fun techniques to add to my gel printed fabrics.

 
On this piece I tried to use her technique of doing a repeat design. I didn't line my screen up very well so the prints are a bit offset, but it's not a big deal. The green layer is from the gel prints. And I also used a curved tip syringe to do some scribbling.


On this piece I drew on the screen with the oil pastels, and then pulled the transparent paint base to transfer the colors to the fabric.


This is a torn paper stencil along with brush strokes. I think this piece of fabric will look a whole lot better when it's cut up.


I used the fabric crayons to do a rubbing from a sink mat onto the fabric, and then screened it with yellow paint.


For this piece I did a rubbing onto the screen, and then pulled it with yellow paint. This works a bit like deconstructed screen printing since the crayon slowly transfers to the fabric and you get color outlines.


For this one I drew directly on the screen with the crayon. It was a grid with random x-es. The x marks deconstructed and lasted a lot longer than the grid. By the fourth pull, the grid was pretty much gone.


I suspended this piece of fabric, filled a syringe with watered down paint and then drew lines, letting the paint drip down the fabric. The paint was pretty dilute and it mostly just spread out. It would be really cool if the paint would form drip marks and not be absorbed into the fabric, but I don't have a clue how that would be accomplished.


Random brush marks, then dip the fabric in very dilute paint, wrinkle it up, then let dry. The dilute paint migrates and makes interesting effects.


Here again I drew on the screen, filled circles and scribble lines. I love the outlines around the circles and lines as the crayon dissolves from the screen onto the fabric. One major difference between working with paints and working with thickened dyes is that the paint cannot be allowed to dry on the screen. If it's not washed immediately, it dries and the screen is ruined. Thickened dye can be allowed to dry on the screen and then it becomes part of the next design also. These little remnants of color really spark up the fabric. I guess I will have to get out the dyes....

Post remodel observation: Since the kitchen level is now insulated to nearly an R-15 and the rest of the house has no insulation we are finding that the kitchen is the warmest room in the house. Used to be the coldest, and in the dead of winter I always had a space heater running under the table to keep me warm. But now we have a dilemma. The thermostat is on the kitchen level. When it's set at 68 degrees, it's fine for that room, but the rest of the house is at least 2 degrees colder, and it's noticeable.  If we jack the thermostat up to make the rest of the house 68 degrees, it's almost too warm in the kitchen. Insulating the rest of the house is not an option, so we're going to have to think of some other method of redistributing the warm air. It's tough in a split level house to get good airflow. And it's supposed to snow tonight. There have only been 4 recorded snows in Baltimore in October. With leaves still on the trees, branches will fall. Bummer. 


Monday, October 17, 2011

Ta-da

It's pretty much complete except for a very few minor things. The POD arrived on Saturday morning at 7:30am and we had it totally emptied out by the evening. That doesn't mean everything was put away, that took much longer. And I'm still not sure that everything is in its permanent place. There will be some re-arranging. 


A trip to IKEA resulted in these bookcases that are in the mudroom. They will hold the odds and ends and shoes and boots and gloves and scarves that never seem to have a home. I think we will add a second shelf above the coat rack. There is room and there is never enough storage space. I have to go back to IKEA for some more shelf liners but I think I need to put blinders on. It's very difficult to get through there without picking up lots of stuff. And they conveniently position carts and bags along the way so that when you fill one up, there is another just waiting for you.


The view into the dining room area. The dining room table and the buffet have not yet been put in place in this picture. 


There isn't a picture of the other side of the room, the family room, because the furniture there is stacked on end. I'm going to do my best to sell it asap. It's old but still in decent condition, and it's perfect for a rec room or college student's apartment.

It's amazing to go back and look at the pictures. Here is the post from the "garage" stage:

And here is the old space:

I can hardly remember what it looked like! Doesn't take long to forget.


Wednesday, October 12, 2011

So close....

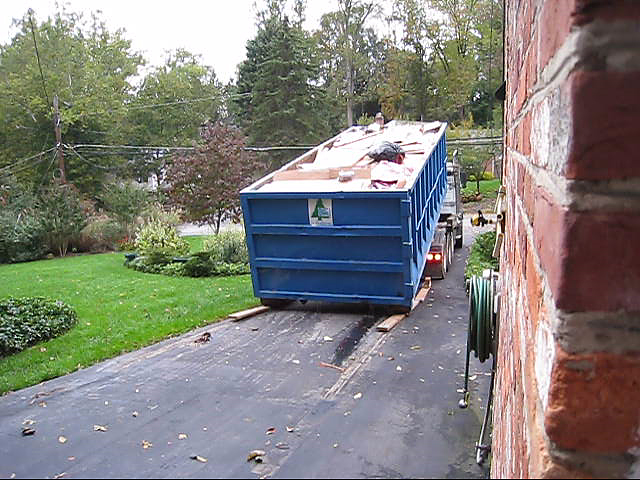
We are almost there. Another visit from the plumber and from the electrician and the work will be complete. The dumpster left today and the POD comes back on Saturday. I tried to get it sooner but they were all booked up with deliveries already. Meanwhile I've been moving stuff from the temporary kitchen into the new kitchen and trying to put things in logical and efficient places. This is a challenge. And of course, keeping in mind that there is a ton of stuff on the POD that will also need a place to stay.


The first official meal is spaghetti. We had to give up our weekly spaghetti because it was just too difficult to cook when I could only use one heating appliance at a time. 


The refrigerator is still not pushed back into position because the ice maker line leaks. Hence the visit from the plumber.


Looking towards the (empty) dining room. Waiting for the table, chairs, and buffet to come home.


Here you can see the stove with my painted tiles on the backsplash. The tile guy thought they were really neat. In front of the sink is the new felted wool rug I bought over the weekend at a studio tour.


Back door with tile entrance and the mud room, which is already collecting stuff. We need to put up a pole for hanging coats and get some cubbies for storing stuff.


Standing in the corner of the dining room. That little blue thing on the floor is Rosie the cat's feeding dish. We will be getting 3 more stools so that the grandkids can eat at the island when we have Sunday dinner. 


The family room area. Looks pretty naked right now. The desk that belonged to my Mother will go in this area and we will have some chairs aimed at the TV.


And the view of the bathroom. 


Good bye, old kitchen. You served us well for many years.

Sunday, October 09, 2011

Milestones

A lot has happened this week. First, the plumber came and hooked up the water supply to the sink. Goodbye, outdoor washing station. Running water inside, so 21st century!


Then the electricians arrived, so along with Steve, our main contractor, his helper, and the 2 electricians, it was a hopping place. At the upper right of this picture you can see the shims they are using to even out the spacing on the boards being used to box in the support beam. The support beam, which has been holding up the house for more than 50 years, has a little bit of a sag. Don't we all. But after it's boxed in, it will be all nice and even.


The pendant lights are installed, the recessed lighting has been recessed. Up to now there have just been hanging bulbs. The electrical outlets are all faced, the dishwasher is installed.


The stove is in place. This is an amazing stove. It has 2 ovens, a small one on top for warming, pizza, and little things like that. Then it has a lower oven for the main meal. There are 5 burners on top. And 2 can be "connected" so that you can put a griddle on there and it will heat evenly. And a warming burner. And a special burner that can be adjusted for small, medium, or large pots. Amazing what they have come up since I last purchased a stove. Fifteen years ago.


We also bought a new chandelier. That is a broom stick that looks likes it's hanging from the chandelier. Look at that island top. We could make fudge on there.


I was so excited to have a working oven! Luckily I hadn't packed away the mixer and its accessories. Had to borrow some cookie sheets, but I made a batch of chocolate chip cookies to christen my new oven. All the workmen were thrilled. 


The tile man is here yesterday and today, laying the floor tile and the back splash. He really liked the painted tiles I had done. They look wonderful above the back of the stove and add a nice bit of color. It looks like we may be completely finished by the middle of this week. Then I have to get the POD back and get it unloaded and start putting stuff away. Need to plan a bit where things will go because once they have a place, they will probably stay there. I think we will be getting rid of a bunch of This End Up furniture that we have had forever. I thought that company went out of business, but apparently not. I found their web site and they still carry the style of furniture we have; it's called "Classic". That means the old stuff, I think. Anyhow, if I were to purchase new what I have now, it would cost $2,000. Wow, but I won't be getting that much for it now. It has some signs of wear and tear. I'll put it up on Craigs List and see what the market will bear.

Tuesday, October 04, 2011

8 Weeks

This is the 8th week, not that I'm counting or anything. All of the cabinets have been installed and they are getting their hardware. The range hood is in its place, waiting for an electrical connection, and a range to vent.


To the right of the window are the cabinets that will hold the microwave and my mixer in an appliance garage. So I won't have to haul a heavy mixer out from underneath a cabinet, which will be nice. Maybe I will use it more often, like for making bread and other high calorie treats.


The plumber is coming today and I sure hope that he gets the sink hooked up because we are really tired of washing dishes outside, not to mention that it's now cold and dark at 7pm.


Over the weekend I gave a lecture and taught a class at a local guild. I took 25 quilts, the earliest dating from 1994 and ending with ones I just finished. It's really interesting to see how my work has changed over the years, at least to me. The group enjoyed the talk, and some even came up afterward and said they were inspired to get back into their studios and get to work. It's a good feeling to know that I've motivated people.

After the lecture I taught a mini-workshop of hand stitching on quilts. When the group asked me to do this class, I thought it was sort of odd because I don't really do a lot of hand stitching. At least I didn't think I did, but when I went to my quilt database and searched on hand work, I came up with quite a few pieces, more than I would have thought. I tried to include as many of those pieces in my lecture as possible, but it seems that a nice percentage have been sold. Can't complain about that. Anyhow, in preparation for teaching this class, I got out some hand dyed threads and a little book of embroidery stitches that I bought years ago, and began experimenting with stitches. It was fun using the basic stitches and playing with variations on them and I think I have inspired myself to include more hand stitching on my work. 
I need to get back into my studio and get to work. This remodeling has been disruptive, but I am feeling the siren call of my fabrics and thread and sewing machine. The place is pretty straightened up and I still need to sew on some sleeves and other maintenance work, but it's time to just get in there and do the work.

This is my acquisition from the SAQA Auction. It's by Deborah Boschert Deborah is the SAQA co-rep from my area, and she and I worked together for 9 months before I "retired" and she got another person to co-rep. I've been really fascinated by Deborah's work and I'm very excited to own this piece. 


Sunday, October 02, 2011

Countertops

On Friday the countertops arrived. The place is really shaping up. The appliances are here but obviously not yet installed. We need the electrician and plumber to come back and make the hookups. Can hardly wait for the dishwasher to be installed. Actually, I would settle for a working sink. It's getting a little dark and chilly to be washing dishes at the outdoor station these days. I'm hoping it will all be complete by mid October. Maybe I should start a betting pool on the finish date...


Tuesday, September 27, 2011

Counter top and floors

The first coat has been applied to the floor. We decided to not have a stain put down, so it is a natural finish to the oak. Today is the second coat, and tomorrow the third.


See how nicely we have taped shut the opening to the rest of the house. Trying to keep the dust to a minimum. Seems to be working pretty well.


I have been impressed by the specialized equipment that the workmen bring. They have machinery that is designed to do a specific task, and to do it well and efficiently. Time is money. This is the thingie that was used to measure for the countertop. I wasn't home at the time, but Jim took pictures and a video. It's fascinating. It has to be accurate because there isn't any ease in stone. Not like cotton fabric that can be steamed into submission.


Here is a video of the measurement action.

.

The appliances will be delivered on Thursday. The automated message from Sears Delivery came this morning with the warning to make sure the appliances will fit through the door and into their designated spaces. I already knew that the doors to the house and the doors to the refrigerator will have to be removed. But I thought I would check the space. A moment of panic - it's only 1/4 inch wider than the refrigerator. I called the cabinet lady and she reassured me that that will be just fine. It was designed to give the refrigerator a built in look and it will fit. She's been right every time before, so I am trusting her once again.

Yesterday I mentioned the start of the third section of the SAQA Benefit Auction. If you were waiting for the price on my donation to come down, you're too late. !!!!! It was purchased at the top tier price and I am thrilled. And a bit stunned. Thank you, Ms. Private Collection! There are still plenty of wonderful pieces available. The price drops to $550 today at 2PM. Further reductions as the week goes on.

Monday, September 26, 2011

Cabinets mostly in

The cabinets are mostly installed. A few have to wait until the countertop is set in - one holds the microwave and another has an appliance garage so I don't have to haul out the mixer from cabinet netherlands whenever I want to use it. One very cool thing is a little step stool that will slide into the toe kick under one of the cabinets in the island. When I need something from a high shelf I can just pull this little stool out and set it up. Not sure it will me reach all the way to the very top shelves, but it will be really handy for the medium high ones.


The back side of the island will have a panel that matches the rest of the cabinets. The refrigerator will go into the space to the left of the window and the stove goes to the right. Today the floor is being sanded and the first sealing layer going down. Towmorrow and Wednesday they will return for additional layers. Thursday the appliances will be delivered and on Friday the countertop will arrive. By next weekend it will look like a kitchen!

There will still be several weeks of finishing - trim on the windows and other places, finishing touches for painting, installation of the dishwasher and garbage disposal, lighting, finishing on the column, floor tile by the door and into the mudroom, tile on the backsplash. We're looking at about the middle of October. Then the POD will return and we can unload all of the furniture back into the space. 

PS Today the 3rd section of the SAQA auction begins; my quilt will be up on the block starting at 2PM today. Bid early!

Tuesday, September 20, 2011

Lookin' Good

Yesterday boxes and boxes of cabinets were delivered. They nearly filled up the entire room. It took Steve all day to unpack them, since he had to check each one to make sure it was correct. This morning he and 2 helpers arrived at 6:30AM (and it's not very light at that hour any more) to start installing them.


Look at this equipment. These are really the big boy tools.


This is what they accomplished today. It's much more than just putting the cabinets into the correct spot. They used their very long levels to make sure each one is leveled front to back and side to side. When I look at what is already installed, I think that it is nearly equal to the storage space I used to have. But - there are still more wall cabinets and base cabinets, plus the entire island yet to be installed. Now, a lot of that space is very high up, and will be difficult for me to reach, even with the little step stool that will be stored in one of the toe kicks. So that will be for the once-a-year stuff. 


Rosie checks out the space. Not going to be nearly as much opportunity for mice to sneak into the kitchen - all the holes to the crawl space have been covered up.


A close-up view of the cabinet door. The wood is hickory and the doors are inset into the cabinet with a bead of wood inside the door frame and also on the door panel. Gorgeous!


Saturday, September 17, 2011

Painted Tiles

Behind the countertop is going to be a tile backsplash that will extend its entire length. Going to the tile store was like going to the fabric shop - so many wonderful things to choose from! However, unlike the fabric shop, the prices ranged from reasonable to the-sky's-the-limit. It would have been quite easy to add several thousand dollars to the price of the remodel just by choosing one of those beautiful tiles. So before I got myself in love with something that would break my already overburdened wallet, I asked to see the tiles that fit into the allowance in our contract. Hmmm - had to go in the back to get those. I chose plain white tiles, 4 inch to go directly above the counter top, then a 1/2" grey liner that picks up the grey/black speckle in the counter top, then 6 inch tiles set on point to extend up to the cabinets. Behind the stove there will be more space since the backsplash will go up to the exhaust fan and I thought it would be interesting to have some tiles with design there.

There is a little shop nearby that has pottery that you can paint and then they fire it for you. Lots of fun things in there and it seems that anybody can do it. While I was there I saw people with their young children who couldn't have been more than 4 years old. The really good stuff takes a lot of practice, but I wanted a more folksy look. Much easier when things don't have to be exact. These are the three tiles I painted. This is not going to be a new hobby - it takes a steady hand and lots of patience. Each color needs 3 layers of paint in order to show up well, and that is tedious. It took me about 3 hours to paint these tiles. I had worked out the design ahead of time and created a template so I could easily transfer the design to the tiles. I like how they turned out and sure do hope they will fit on the wall!


Friday, September 16, 2011

Looking pretty good


It's been a bit of a slow week. Workmen were here 3 days out of 5 - 1 day for putting up trim, 1 day for painting, and 1 day for laying the floor.


First, the powder room. This was not part of the project, but it needed some updating, so Jim took it on himself to strip the wallpaper and paint the room. We thought about replacing the vanity but all the ones in the stores were cheesy fiberboard and the one we have is solid oak, so it stayed and got new hardware and a new faucet. This picture shows the color as bright yellow, and that is totally wrong. It's actually a peach, which matches a flower in the tile in the floor.


This is after the walls have been painted. The trim is white and the walls are a very pale yellow. It's going to be very cheery with lots of natural light.


And here is the oak floor all down. It looks like a real room again. Because the walls were built out further than the original walls, the windows are set in much deeper and there is a nice wide window sill. I'm sure I can find something to put there. Maybe African violets, it's a northern exposure.


Looking towards the back door and the mud room, which now has a door.


The cabinets will be delivered on Monday and it won't take very long to get them installed. The floor will be sanded and finished, but I'm not sure where in the process that will happen. Once the cabinets and sink are in, they can measure for the counter top. It's really all coming together!